Starting with version 2.4.0, Virtual Private Network Next Generation (VPN NG) support was introduced, it is a client-to-site remote access VPN based on the SSL protocol, but more robust, making connection via TCP, UDP and ICMP.
Advantages of VPN NG:
- MFA support with Google Authenticator
- Bypass via TCP, UDP and ICMP
- VPN revolutionary features about ICMP and VPN over DNS.
- Granularity
- Robustez
- Fully customised client
For technical details about the service, see official documentation.
1 - Creating entry rule for service.
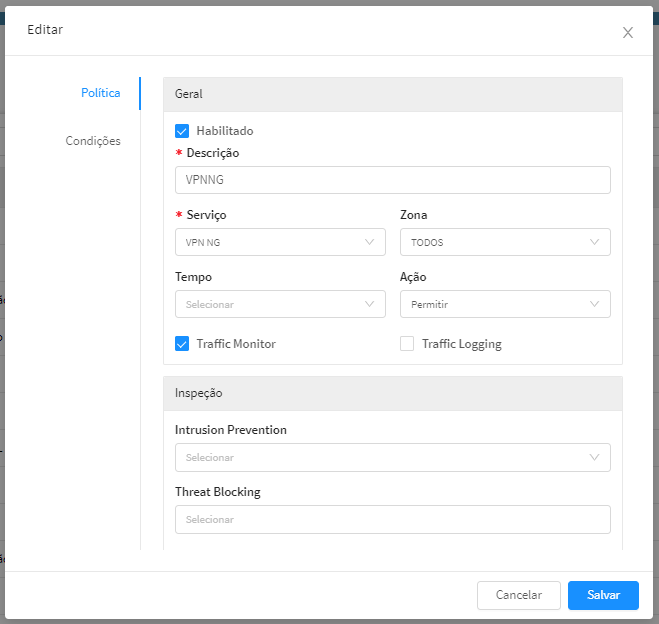
Like all services running on Blockbit, VPN NG is no different, we need to create an entry rule (Zone Protection).
In version 2.4.0 the object of service is not yet created by default, so creation is needed as an example below.
In 2.4.1 the object is created by default.
To create the object go to Settings > Objects > Services
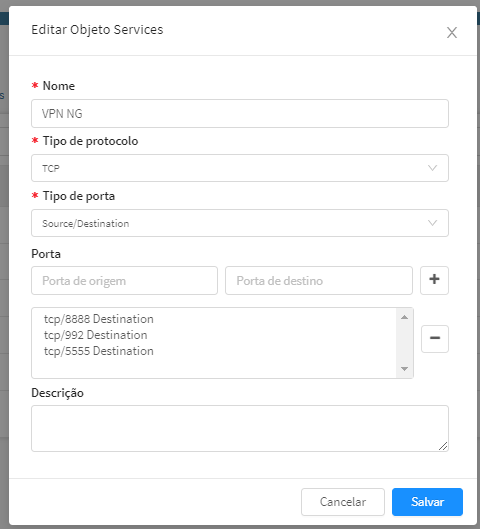
After creating the object we go to Services > Firewall > Zone Protection and create a new rule allowing the service.
2- Activation and configuration
Enable Service > VPN NG
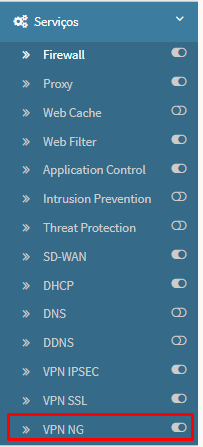
After activation it is necessary to perform the configuration itself.
In VPN NG, it is possible to create multiple HUBs with distinct networks and configurations, providing broader granularity.
To create a new hub click "new item" and fill in the form as example below.
In the first block, VPN NG HUB network information will be inserted
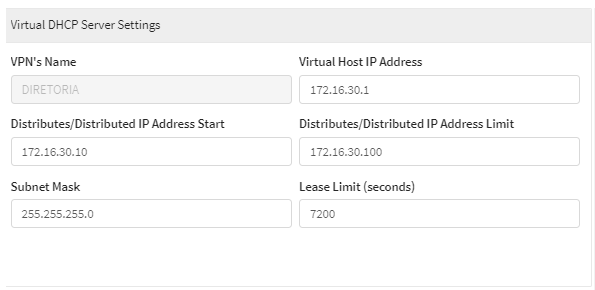
- VPN's name = HUB name
- Virtual Host IP Addresses = It will be the hub gateway ip
- Distributes/Distributed IP Addresses Start and Distributed IP Addresses Limit = Network Scope that will be distributed by DHCP
- Subnet Mask = Network Masquerade for HUB
- Lease Limit = DHCP Lease Time
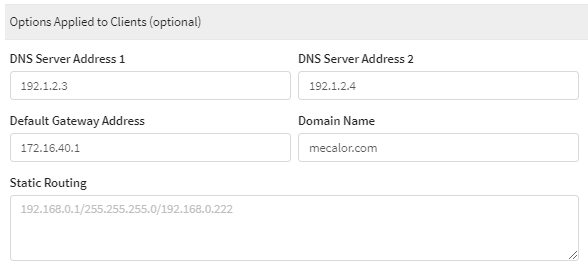
- DNS Server Address 1 and 2 = DNS that will be distributed to network
- Domain name = Network DNS Suffix
- Default Gateway Address = It will be the gateway linked to VPN NG HUB, it is equivalent to the "Gateway Default" parameter in the other VPN's. If it's filled, all navigation will exit by VPN.
Example by playing all the traffic by VPN (Virtual Host IP Addresses IP IP):
And in this example we set the route only to communicate with the company's networks and navigation exit through the user's machine:
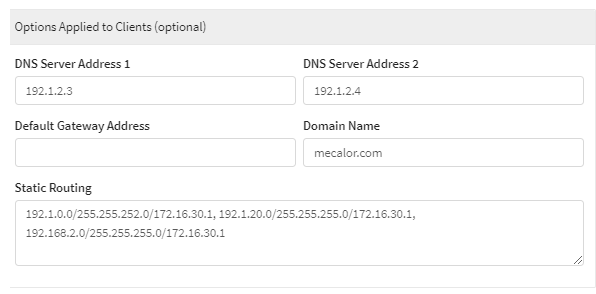
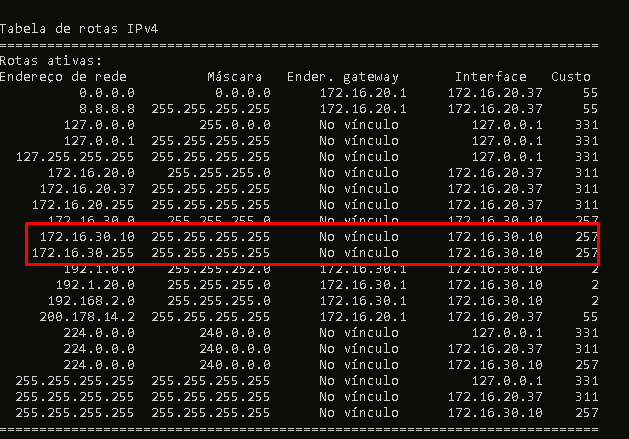
To set the route the following structure should be used NETWORK/MSK/GW - Example:192.1.0.0/255.252.0/172.16.30.1
IMPORTANT: It is crucial to pay close attention to the syntax of inclusion of static routes. If no network/mask/gateway information is provided, the service will not apply VPN NG DHCP scope settings.
In the Add users block, users who can access this HUB will be defined, in version 2.4.0 it is only possible to select users, in 2.4.1 it is possible to add users and groups.
3 - Client settings
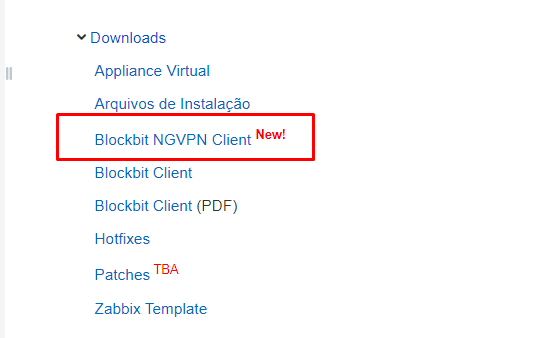
Download VPN Manager from Blockbit Resource Center
With the client open right click on "Virtual Adapter Name" and create a new network adapter.
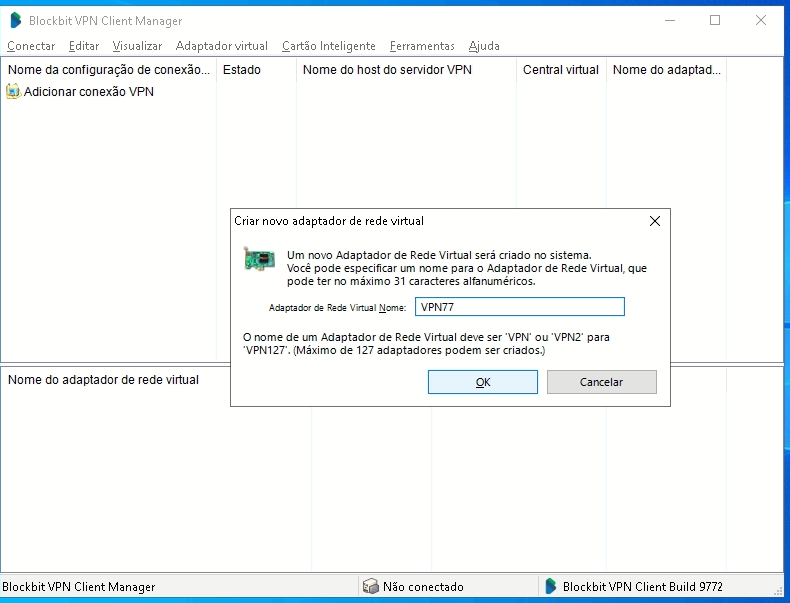
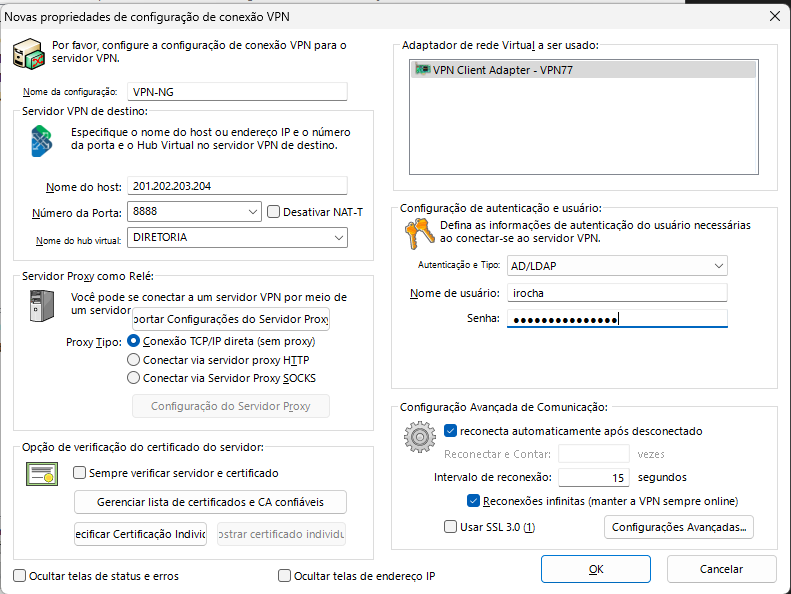
Click Add VPN Connection and fill as example below:
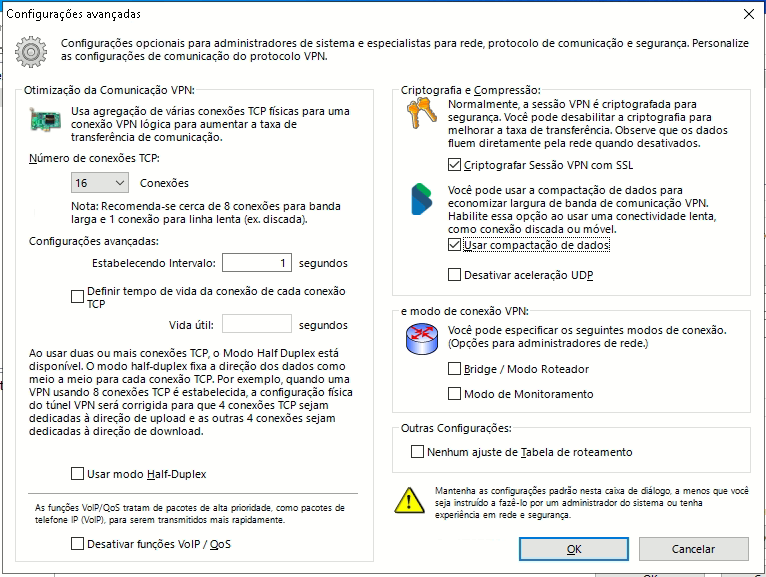
Click advanced settings and finish setting.
After this save and perform the connection test.
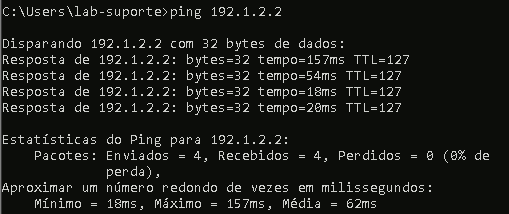
Recalling that for effective communication it is necessary to implement the routing rules between VPN NG networks and NGFW networks.

EXTRA TIPS
TIP 1:
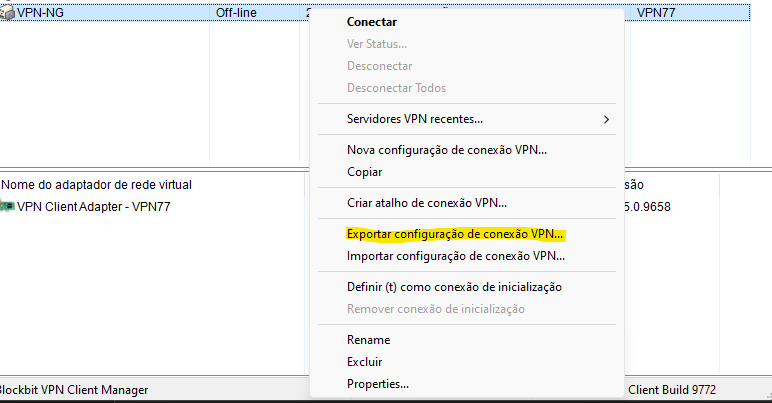
You can export the configuration to be sent to the user only to import:
TIP2:
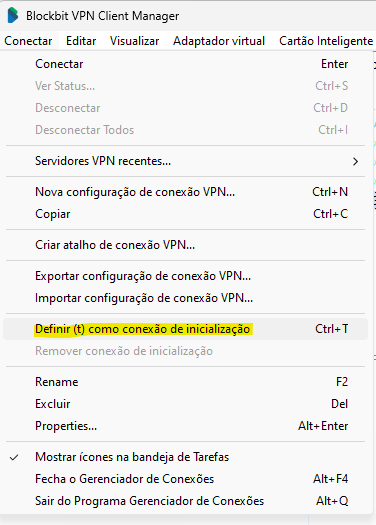
It is also possible to configure for the client to start with the PC in the option "Set (t) as boot connection":
TIP 3:
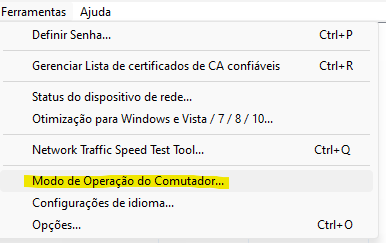
In Operation Mode, it is possible to set the "easy mode" on users' machines, with this setting you turn into a more simplified client, making it easier for users.
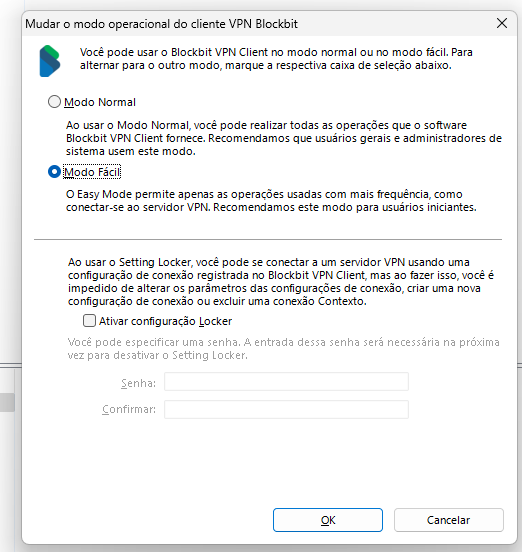
How is the client in easy mode: