Before using Gmail account in Blockbit NGFW notifications, you need to activate the option that allows setting up Google service to be used as an email server. For security reasons, this function requires two-step verification.
Check below how to perform activation:
- Open Gmail:
- Click on your photo in the upper right corner;
- Select “Manage Your Google Account”

- Click Security on the left panel;

- Roll the screen down, click “Two-step Check”;
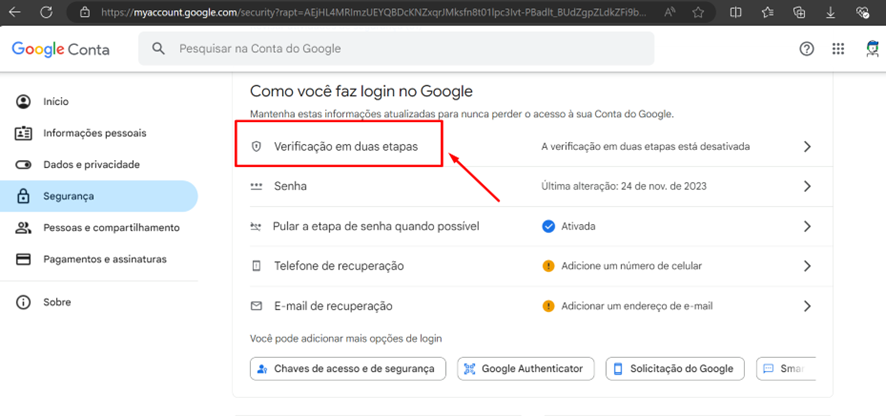
- Click “Enable two-step verification”;

- Add the mobile number that will receive the SMS, then click “Next”;

Add the Google verification code received via SMS to the informed number;

- After checking the number, go to “App passwords”;
- Give the name to use in the desired app and click “Create”;
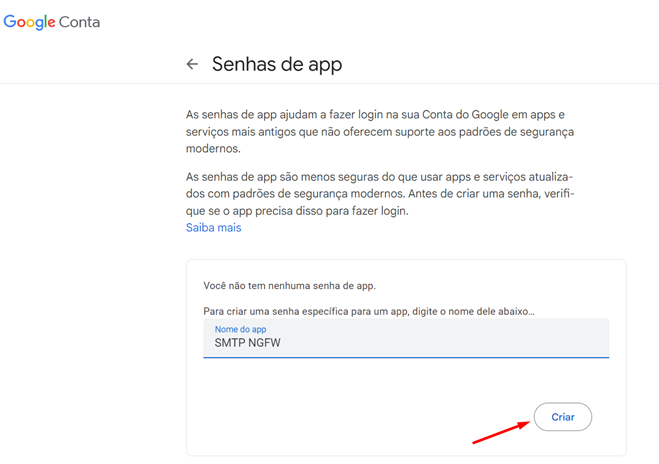
- Save the app password to use in Blockbit NGFW and click “Completed”.

Email notification settings in Blockbit NGFW
Now with everything ready on Gmail, let's go to NGFW Blockbit settings.
Check the following information to configure notifications via email with the Gmail account in Blockbit NGFW.
First we must create an object of IPv4 address FQDN address type with hostname smtp.gmail. with selected option single.
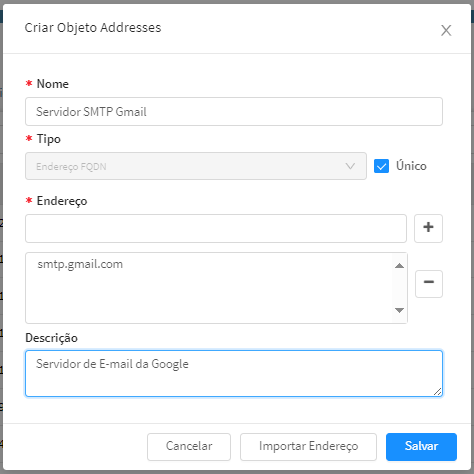
After the object has been created, now you go in the configuration of notifications and configure e-mail notification with the following information:
•IP: (Select created object)
•SMTP port SSL/TLS secure connection: 465;
•SMTP port secure connection STARTLS: 587;
•User: your Gmail user or full address (e.g. your user or Your usuario@gmail.com);
•Sender: your full address of Gmail (e.g. Your usuario@gmail.com);
•Password: use the password generated from the app.
•Consignee: the email address that will receive notifications;